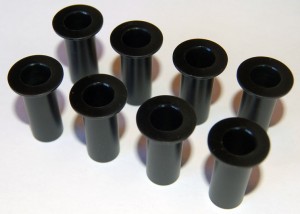
The rear doors on the Jeep were getting pretty stiff and not closing properly, due to deteriorating factory hinge bushings.
Found a company in Canada called TMR Customs that machines delrin bushings for the JK for $50 (for a 4 door JK). They showed up today, and I was anxious to get them installed.
Last weekend I took the doors off for the first time ever (abt 5years), and they were a bear to remove. I ended up using a floor jack to lift the doors out of the hinges. While the doors were off, I removed the hinges from the doors, sanded the bubbling factory paint off them, and then repainted using bed-liner. Looks pretty good I think. Just have to do the bottom half of the hinges next, but that might have to wait til next spring 🙂
Anyway, this time, the doors were much easier to remove – I was able to just lift the doors off without having to resort to the floor jack 🙂
I drilled out the old metal shims and plastic bushings that were jamming up the doors with a 1/2″ drill bit, cleaned up the pins and hinges, and the new bushings pressed into place nicely.
The doors dropped back in nice and smooth, and the doors are working better than ever!
Category Archives: Hobbies
New wheels!
Well, after almost 5 years, the tires that came with my Jeep have been replaced, and along with the new (to me) rubber, I replaced the alloy rims with a set of Pro Comp steel ones – and I’m no longer using the TPMS valve stems that were in the factory rims.
I think TPMS is a pretty nice feature – however, in the Jeep Wrangler, I think the implementation is pretty flawed.
- Only a light saying pressure is low – but no indication of which tire is low. I had a 2005 Jeep Liberty with TPMS, and it told you which tire was low.
- Aluminum valve stems that cannot be replaced without replacing the entire TPMS assembly in the tire. I had one assembly replaced because the stem had corroded to the point where there were only a couple threads of the needle valve keeping air in – the rest of the needle valve was exposed. Not a comfortable situation to find yourself in when you’re planning a road trip.


Here’s a shot of one of the tires with the new wheels. The new tires are the same as original equipment tires – 32″ BFG MT’s. The new steel wheels are Pro Comp Rock Crawler Series 98 rims in flat black. I also got wheel caps and new lug nuts, in chrome (the shop didn’t have any black ones in stock). I think they look pretty good!
Record Cabinet
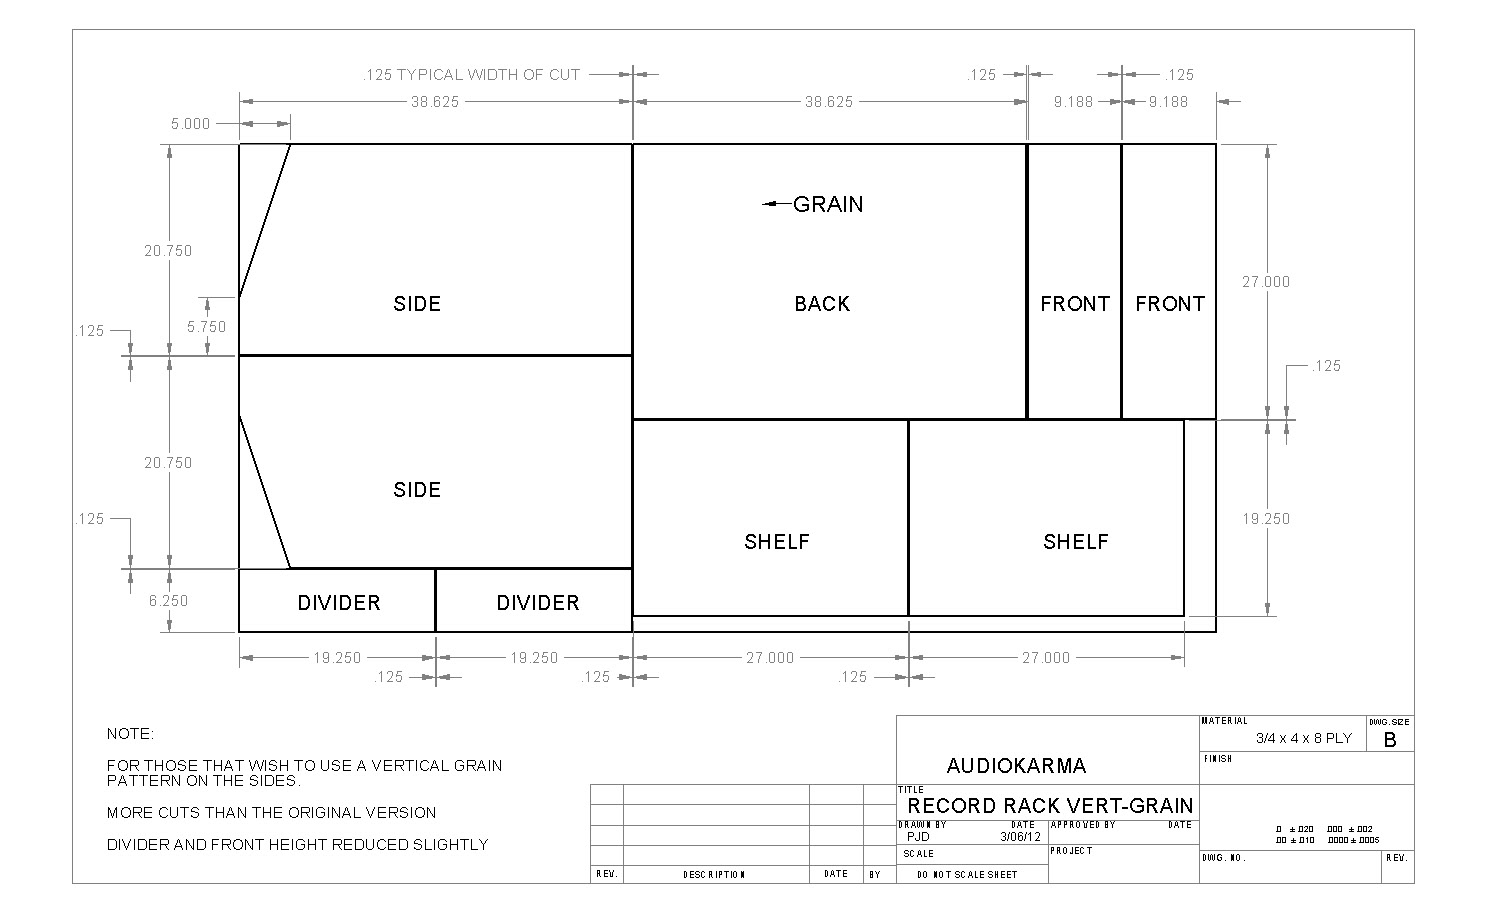
I’ve had a fairly large collection of vinyl that has been sitting in cardboard boxes for quite some time. Decided to dust off the collection and build some better storage for it. Researched on-line and found some excellent plans from the Audiokarma forum.
 The casters I used are urethane wheels with precision ball bearings, rated for 275lbs. Perhaps a little overkill, but they work great!
I used 3/4″ oak veneer plywood for the cabinet, and stained it with a combination stain/poly.
Pretty pleased with the results – will have to build another one to hold the rest of my collection!

Staun Tyre Deflators
 Picked up a set of these Staun Tyre Deflators – and looking forward to getting them all set up, and using them for the first time!. They feel pretty heavy duty – and seem pretty straightforward to set up. Here are the instructions from the package – more or less ;^)
1. deflate a spare tire to your preferred deflation pressure.
2. with lock ring and adjusting cap wound down, screw your Staun Tyre Deflator onto the valve stem making sure it’s clean and threads are in good condition.
3. Loosen cap (anticlockwise) until deflator pops open, then immediately tighten cap to the position where air stops exhausting.
4. Turn lock ring up to adjusting cap and tighten.
Now that the deflator is set to the preferred deflation pressure, adjustments can be made if necessary at the rate of 3 psi per half turn of the adjusting cap.
If the tire pressure, and the deflator setting is within 8 psi of one another, a manual start of the deflator may be needed. Just pull the center pin up to start things up. Keep the deflators clean and dry, and do not interchange components (I wonder why?).
After tires have been deflated, remove the deflators. Don’t wheel with them on!
More winter wheeling!
The Jeep is packed, the rear tow hook on – all set for the morning. We’re off to a spot an hour or so west of the city, near the town of Darwell. I have the video camera ready, as well as the digital camera. Hopefully can get the wife and kids moving early enough!
[UPDATE] Well, what a blast again!
And Tracey and the kids enjoyed themselves as well! Got a few cheers from them as we made our way up a few hills, and also a few screams, as the back end slid to the side on the way up one hill in particular. They weren’t too comfortable with the angle we were sitting at :^)
Had to get tugged out in a couple spots – but we also got to do some tugging to help others as well – which made it all the more fun! At the end of the day there were a few scratches – looks like they’re limited to the mirrors and the hard top though – so all is good! Can’t wait to get out again!