Things have been rocky lately with my Raspberry Pi running Homeseer – over the past couple weeks it was randomly stopping to respond. This began after attempting to update the system to the latest stable version (and being lazy I forgot to do a complete backup!).
After reflashing the micro SD card at least 4 or 5 times, I bought a couple new SD cards to use. Tried a couple more times and I thought I had things back, but 2 days later it all halted again. Enough with the Raspberry Pi.
I decided to get a license for HS4 Standard, and run it on an older Windows 10 workstation I have. The installation was a breeze – although I did have a hiccup when adding the interface – was a bit of a guess choosing the Sigma UBZ interface (I have a Homeseer SmartStick +), and then the COM port (1 or 3).
Service is up and running nice now, and a couple events set up – just have to work on them more and get my garage door events rebuilt and running again.
The Gecko was running for a bit, but I’m going to make some changes to it. The Z axis is messed up, and slips once you try to move about 50mm above the bed.
I’ve been following the different Voron builds lately, and I really like the gantry support used in the Voron 2.4 – using linear rails, steppers and belts at each corner. I also like the electronics arrangement – particularly the DIN rails to mount everything to.
I would also like to build a Voron 0.1 – the small size is amazing, as well as the speed. I first saw it on the CNC Kitchen youtube channel.
So here’s my initial checklist:
modify the existing gantry of the Gecko to use the Z drive approach of the Voron 2.4.
I like the Voron 0.8 approach to the electronics – mounting them at the back of the printer. Would be so much easier to work on, rather than flipping the printer over.
replace the Lerdge S board with a BigTreeTech Octopus.
I want to move away from the E3D Titan extruder, and will see if I can use the Afterburner or StealthBurner tool end designs with the current Gecko gantry. Ultimately I may just end up building a new gantry as well, and just convert the Gecko completely to a Voron instead of a Geckostein 🙂
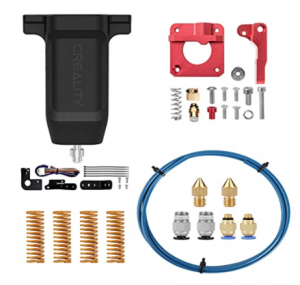
However, I’ve only installed the CR-Touch (and updated the firmware), and the bed spring upgrades – and I’ve been very happy with the prints – PLA, PETG, and ABS – very impressive for such an inexpensive printer! I’ll hold off with the rest of the upgrades until stuff actually fails. When that happens, I think I might also switch to the Micro Swiss direct extruder as well – but we’ll see!
I’ve been watching a lot of YouTube videos about sumps and overflows lately – and I am contemplating replacing my Hydor canister filter with a sump. Challenge is with the stand that I built – and getting a suitable sump to fit.
As luck would have it, after adding a few new fish to the aquarium, the impeller decided to blow up. As I haven’t been able to move forward on the sump – I had to get the filtration running ASAP, so I ended up purchasing a new canister filter from the closest pet store, Petland.
The new additions to the tank included 4 more Denison barbs – these ones are pretty young and only about 1.5-2″ long right now, but are schooling great with the older ones that are about 3.5″ now. I also added 5 little Julii Cory’s to help out the 3 clown plecos (that I rarely see). I still only have the one discus – would like to add a couple more at some point.
I would have just replaced the impeller, and I had actually been searching for one as a backup. Unfortunately I was unable to find one in town or online. It’s a shame, as the Hydor 250 has been working very well, and I had the filter cleaning process down. I might see if another brand of impeller might be suitable, or perhaps see if I can cast a new blade.
The new filter I picked up is a Fluval 406 – it’s good for up to a 100 gallon tank. In setting up the filter, I replaced the carbon pouches with more bio media – the stuff I had already in the Hydor filter, along with a bunch of the Eheim substrata sintered glass spheres.
The media boxes don’t feel as durable as the Hydor trays – the plastic feels more brittle – but we’ll see how things go.
Some of the nice features are the quick release hose assembly at the pump – will be interesting to see how well it works in a week when I give the pre filter it’s first cleaning. The other nice feature is the priming pump – while it doesn’t feel very robust, it did work very well.
The pump did not come with any sort of pre-filter for the intake, so I might look at adding one in the near future, and it also didn’t come with a spray bar. I prefer that to the included spout, which seems a little aggressive – fortunately I was able to reuse the Hydor spray bar.
While spending time in Victoria, I discovered a delicious apple cake at a coffee shop called the Nest. Now that I’m home, I’m trying to find a recipe that comes close.
This one turned out very good – and is a little lighter than the Nest cake which is not a bad thing! I also had some zucchini that I wanted to use up. Next time I make this, I think I will use a full teaspoon of cloves, and maybe add a half teaspoon of ground ginger.
This is a recipe from a friends mother – it’s pretty flexible and easy to make. So far I’ve used it to make Saskatoon Berry Scones as well as Blueberry Scones.
2eacheggsbeaten, can reserve one yolk to wash tops if you like
Instructions
Mix all dry ingredients, and then cut in butter with pastry cutter
Wash and dry berries, then toss gently to get evenly distribute throughout mixture
Add eggs and milk, and mix to combine and wet all of the flour/butter/berry mixture. Don't over mix or knead.
Roll into a cylinder, approx. 3-4" in diameter. Can either cut discs approx 1.5 – 2" thick, or gently flatten cylinder and then cut triangles.
Place pieces onto parchment lined baking sheet, keep pieces at least 1" apart.
If desired, brush tops with egg wash and lightly sprinkle with sugar.
Bake for 15-20 minutes @ 425 degrees Farenheit, or until golden brown on top.
Recipe Notes
First time making this recipe I made the scones with Saskatoon berries. I over mixed these a little – making them a bit dense. The Blueberry scones I worked much less, and the result was much nicer 🙂